Last updated by: SassafrasAU, Last updated on: 04/05/2024
Github Org Guide
Redback GitHub structure
Document Creation: 9 March, 2024. Last Edited: 9 March, 2024. Authors: Leesa Ward.
Rationale
Benefits - why are we using an org?
Using a GitHub Organisation allows us to:
- Have multiple people create and manage repositories in a central location (not in personal accounts), allowing Redback to have separate repositories for each application or other codebase being developed without the tutor(s) managing the GitHub account having to do this or work being scattered across students’ personal accounts.
- Through having multiple repositories, keep code appropriately separated so that students only download what they want to work on to their machines (not huge repositories full of work they’ll never touch), and can just look at pull requests and issues for what they’re working on or are interested in.
- Easily archive repositories at the beginning or end of a trimester if work will not be continuing using that repository, making it clear which codebases are currently active and should be used.
- Maintain dependencies more easily because students can be confident that any changes will only affect their project, as well as not needlessly maintaining dependencies for sub-folders containing applications that aren’t being worked on anymore.
- Onboard students more easily because they are able to locate the purpose-built repository they want to work on and (quality documentation assumed) clone and run it with minimal guidance and no confusion about where the current and correct code is for their project and which instructions are relevant to them.
Guiding Principles
This rationale and the following guidelines are based on the principles of:
- Ensuring our projects closely resemble how things are done in the industry.
- Enabling students to onboard as easily as possible.
- Empowering students to contribute and take ownership of their capstone project work.
- Facilitating easy handover and project continuity between trimesters.
Key Terms
Repository: A Git repository is a central location for storing, managing, and tracking changes in files and directories for code-based projects. In some contexts, you may hear or see ‘repository’ and ‘project’ used interchangeably because a single project may have a single repository for its code. If a repository contains the code for a web app, mobile app, data manipulation library, etc that is being developed by Redback, terms like ‘app’ or ‘library’ may also be interchangeable (e.g., ‘Go and clone the app from GitHub’).
Project: Redback Operations has a handful of projects running at any one time, and some projects may involve working on more than one repository. It is strongly encouraged to be mindful about when it is appropriate to create a new repository, striking a balance between: forking or branching from an existing one so that we don’t end up with needlessly divergent work and confusing amounts of repositories, and keeping codebases usefully siloed and not ending up with a single repository that tries to do to many things
Member: Students and tutors can be added as organisation members. It is important to note that members can create repositories within the organisation and by default are the administrators of the repositories they create.
Collaborator: Students can be added to individual repositories as collaborators. This enables them to be given appropriate permissions for the work they will be doing without the ability to create or manage repositories also being given by default.
Team: Each Redback project has a Team within the GitHub organisation that contains tutors, project leaders, and experienced students who will be managing repos, approving pull requests, etc. Teams can also be @ mentioned in issues, pull requests, and comments to notify those staff and students that their attention is required. Assigning repositories to a Team also simplifies managing repository permissions across trimesters – people only need to be added to or removed from a team to have access to that Team’s repositories granted or revoked. There is also a Tutors team that should be added to every new repository with admin permissions.
How-to, the short version: Repository health checklist
If you’re already familiar with GitHub and the org concepts outlined above, here’s the short version of the guidelines you should ensure your Redback repository follows.
If you are a leader taking on an existing repository, you should also check it at the start of the trimester to ensure these guidelines are followed.
More information about each setting is detailed in the ‘Long version’ section starting on the next page.
| Name | ✓ Clearly but concisely says what the repo is for ✓ Does not include information that could change in future trimesters1 ✓ Does not include trimester number or year1 |
| Description | ✓ Is filled in with a concise description that enables new students to quickly understand which project(s), or part of a project, the repository is for |
| Visibility | ✓ Private for cyber security projects ✓ Public for all others |
| Licence | ✓ MIT for all open source (i.e., non-Cyber Security) projects2 |
| Permissions | ✓ Tutors team has admin role ✓ Project team has write role ✓ Contributing students have write role |
| Branch protection | ✓ Main branch cannot be directly pushed to ✓ Pull request approvals are required |
| CODEOWNERS file | ✓ File exists in the root of the repository and designates the Tutors and project teams as the global code owners |
| README file | ✓ Contains description of the project ✓ Contains prerequisites for running the code ✓ Contains clear instructions to enable students to independently set up and start working on the codebase |
1To encourage continuity of projects across trimesters, generic non-time-specific names are encouraged. Using internal
designations like ‘Project 4’ is also discouraged because the projects might be consolidated or split up in future trimesters.
2Unless there is a reason to use a different licence, such as a project dependency having licence terms that require the work using it
to have another licence.
How-to, the long version: Creating a new repository or checking an existing one
If you have an existing repository that you would like to check over or update, skip ahead to the ‘General Settings’ section below.
Prerequities
- You have at least the Member role in the GitHub Org.
- Consensus has been reached within the Project team (at university level, not GitHub level) and with project leaders that a new repository is needed.
- A GitHub Team exists for the Redback Project this repository will be for.
Getting started
- Go to the Repositories tab on the org page and click the ‘New Repository’ button.

- Name and description: Choose a short but clear name that makes it obvious which project this repo is for and what code will be in it (for example, crowd-monitoring-web-app) and accompany it with a concise description.
Avoid using:
- Things that may change in future trimesters such as the capstone project number (e.g., ‘crowd-monitoring-web-app’ not ‘project-4’)
- The trimester or year, unless you have reason to believe your repository won’t be used beyond the current trimester.
Put yourself in the shoes of a new student onboarding into Redback for their first capstone trimester. Would you be able quickly tell that this is the repo you will be working on?
-
Visibility: For Cyber Security projects, choose Private. For all other projects, choose Public.
-
Tick ‘Add a readme file’ and choose a gitignore template if you see fit.
-
Choose a licence: All Redback projects except Cyber Security are open source, so our default licence is MIT.
Some third-party libraries have licence terms that may affect which licence you can use. For example, licence terms dictate that plugins developed for WordPress must be GPL-compatible.
- Click ‘Create Repository’ in the bottom right. You will be taken to your new repo.
General Settings
- Click the 'Settings' tab.

-
Untick any features you don’t intend to use, such as Wikis. You can always turn them back on later if needed, but it can be good to keep things simple at first
-
Pull request settings: Choose the settings your team prefers here. Don’t worry, you can always change these later if you find what you choose now doesn’t work for your team.
- Squash merging: can be a good default choice because if someone has many commits to their pull request (which is very common), ‘squash and merge’ commits them all to the main branch in one clean commit. This can be much easier for people navigating the commit history as well as making it far easier to revert a change if necessary than if a merge creates multiple commits.
- Turning on ‘Always suggest updating pull request branches’ can be helpful for ensuring students keep their PR branches up-to-date with the main branch and resolve any conflicts incrementally as they go, rather than ending up withn a lot of conflicts to resolve because the main branch as diverged far from theirs.
- Turning on ‘Allow auto-merge’ can be helpful as it means you don’t have to wait for students to manually merge their PR once it’s approved, improving efficiency.
Settings in this screen are autosaved.
Collaborators and teams
-
Still in the Settings area, click ‘Collaborators and Teams’ in the sidebar.
-
Next to ‘Manage access’, click ‘Add teams.’ Search for and select the Tutors team and the other relevant project team(s).
-
In the list, update the Tutors group role to ‘Admin’ and the project team’s to Write.
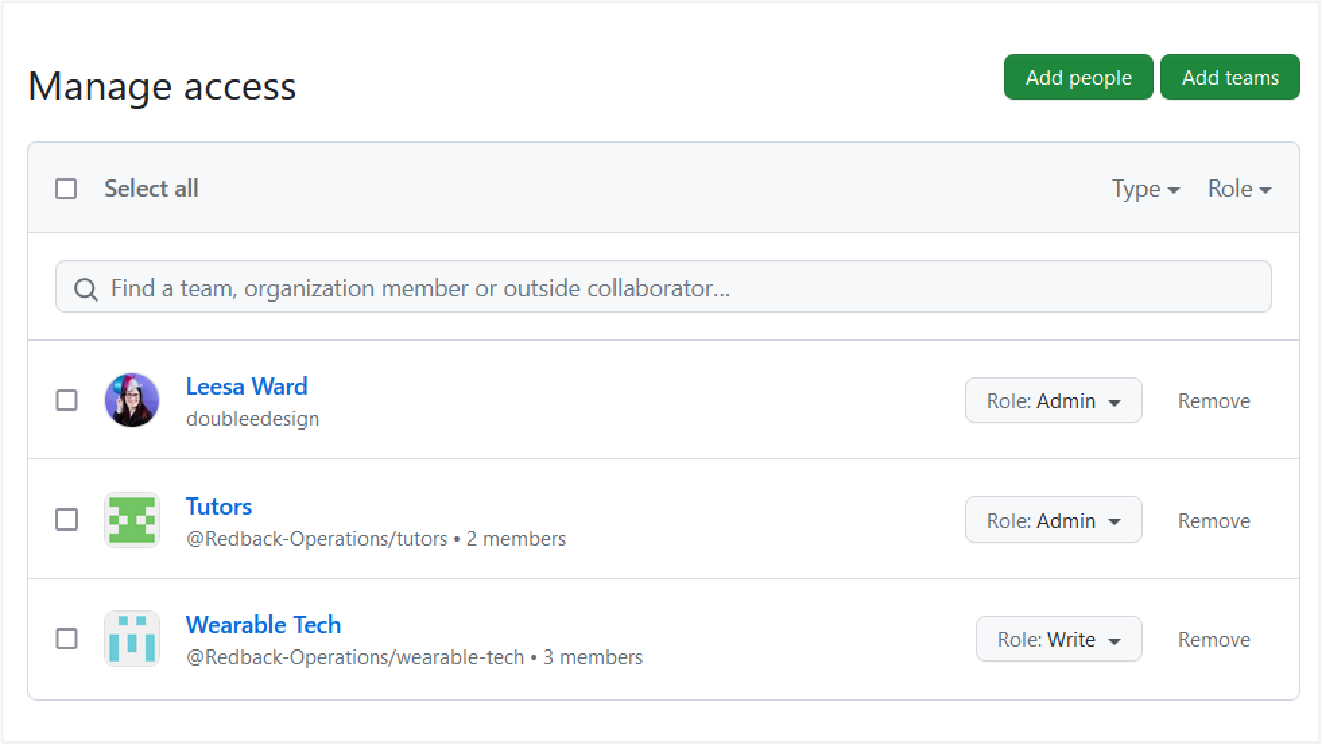
- This is also where you individually add other students who will be working on the project, as Collaborators. They will need the Write permission so they can create branches.
Ensure branch protection rules are in place (instructions below) before adding students with Write permission, to ensure they can’t write directly to the main branch.
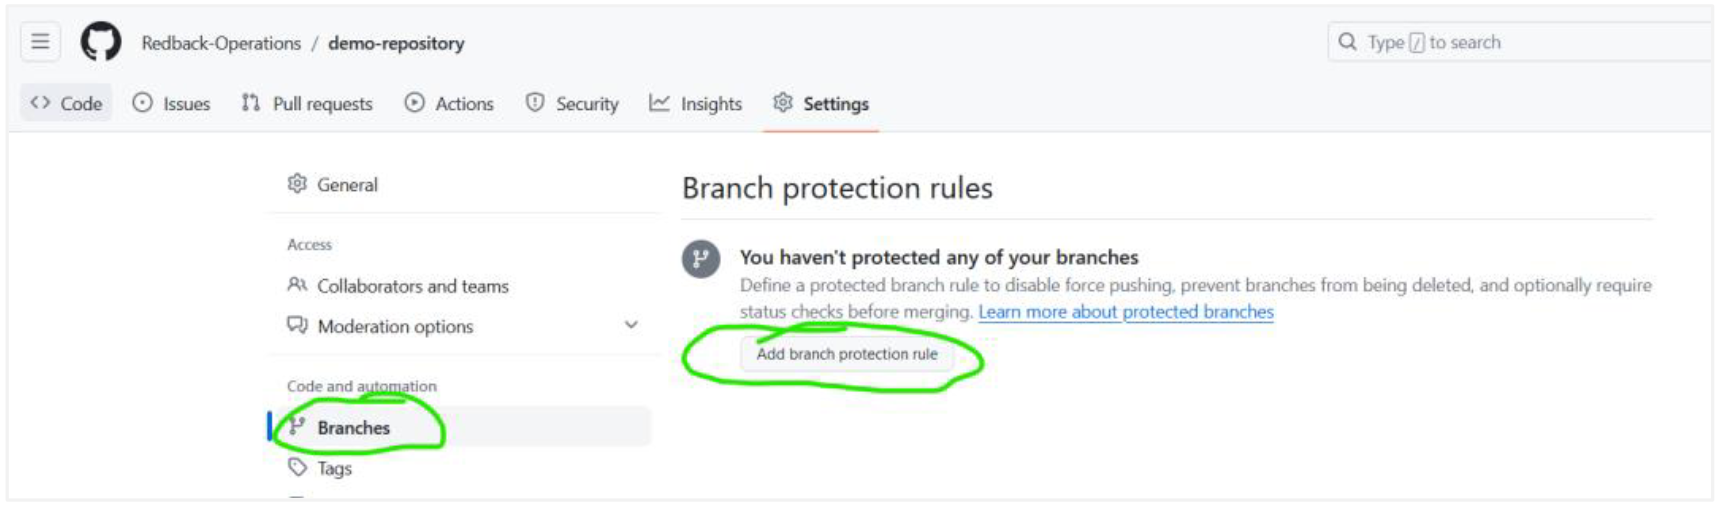
Branch Protection Rules and Code Owners
- In the sidebar, click ‘Branches’ and then the ‘Add branch protection rule’ button.
-
In the ‘branch name pattern’ field, enter ‘main’ (or the name of your primary branch if different).
-
Tick ‘Require a pull request before merging’ and ‘require approvals’ followed by the settings appropriate for your project.
-
‘Dismiss stale pull request approvals when new commits are pushed’ is highly recommended. This prevents anyone from adding new code after a PR is approved, and merging that new code without it being re-reviewed.
-
Enabling ‘Require review from code owners’ is kindly requested by the Redback mentor/tutor team. This is simply to ensure a pair of experienced eyes looks at each pull request to catch mistakes such as committing credentials, node_modules folders, Python precompile files, MacOS .DS_Store files, etc.
- If you turned on ‘require review from code owners’, you now need to specify who those owners are through a CODEOWNERS file. Navigate to the main page of your repository and click ‘add file.’
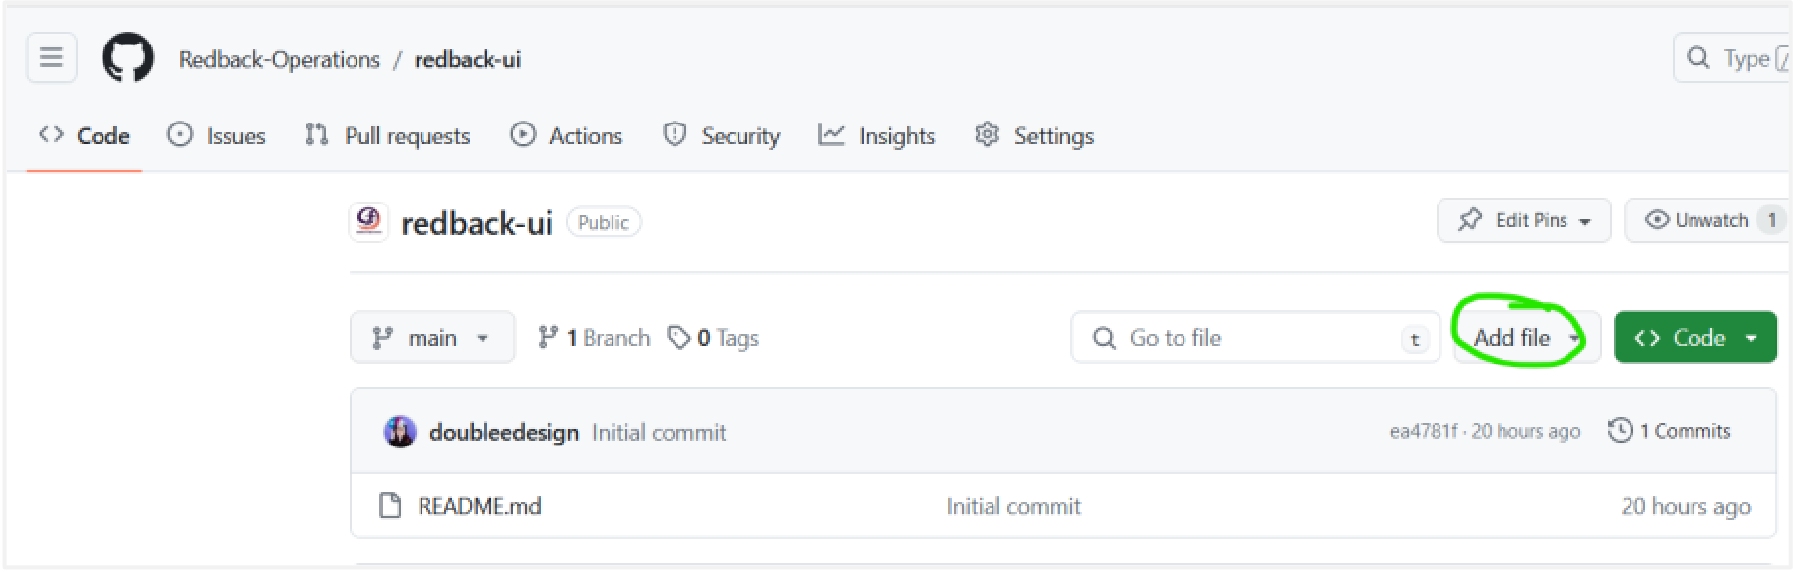
Name the file CODEOWNERS and add global owners using the * symbol and @team-name. For example:

When done, click ‘commit changes’ in the top right and follow the prompts. If you have any errors such as a misspelled team name or incorrect permissions for that team, an alert will be displayed.
Readme File
- Either through the GitHub web interface or after cloning the repo to your machine, enter more information in the
README file:
-
A clear description of what this repository is for. It should be concise, but this is the place to provide a bit more detail than the brief description entered when you created the repo.
-
Instructions on how to set up the repo and start working with it. Include prerequisites (e.g., for a JavaScript project, having Node installed) and step-by-step instructions that ensure the majority of students will be able to independently set up and run the project locally.
-
You may not have all this information ready yet for a new repository that doesn’t contain any code yet, so simply ensure you return to this step when you do.