Last updated by: yuhanhb, Last updated on: 22/09/2024
Redback Nagios Setup Guide
Yuhan Bulathsinhalage
Date: 21/09/2024
Redback server - Ubuntu 20.04.6 LTS (Focal Fossa)
Running as Root
All steps require running as root. To become root, simply run:
Ubuntu:
sudo -i
All commands from this point onwards will be as root.
Prerequisites
Ubuntu 20.04:
apt-get update
apt-get install -y autoconf gcc libc6 make wget unzip apache2 apache2-utils php libgd-dev
apt-get install openssl libssl-dev
Downloading the Source
cd /tmp
wget -O nagioscore.tar.gz https://github.com/NagiosEnterprises/nagioscore/archive/nagios-4.4.14.tar.gz
tar xzf nagioscore.tar.gz
Compile
cd /tmp/nagioscore-nagios-4.4.14/
./configure --with-httpd-conf=/etc/apache2/sites-enabled
make all
Create User and Group
This creates the nagios user and group. The www-data user is also added to the nagios group.
make install-groups-users
usermod -a -G nagios www-data
Install Binaries
This step installs the binary files, CGIs, and HTML files.
make install
Install Service/Daemon
This installs the service/daemon files and configures them to start on boot.
make install-daemoninit
Install Command Mode
This installs and configures the external command file.
make install-commandmode
Install Configuration Files
This installs the SAMPLE configuration files, required to start Nagios.
make install-config
Install Apache Config Files
This installs the Apache web server configuration files and configures the Apache settings.
make install-webconf
a2enmod rewrite
a2enmod cgi
Configure Firewall
Allow port 80 inbound traffic on the local firewall for Nagios Core web interface access.
iptables -I INPUT -p tcp --destination-port 80 -j ACCEPT
apt-get install -y iptables-persistent
Answer yes to saving existing rules.
Create nagiosadmin User Account
You'll need to create an Apache user account to log into Nagios. The following command will create a user account called nagiosadmin:
htpasswd -c /usr/local/nagios/etc/htpasswd.users nagiosadmin
When adding additional users, remove -c from the command to avoid replacing the existing nagiosadmin user.
Start Apache Web Server
Restart the Apache server after making the changes.
systemctl restart apache2.service
Start Nagios Service/Daemon
Start the Nagios service.
systemctl start nagios.service
Test Nagios
Nagios is now running. To confirm, log into the Nagios Web Interface by pointing your browser to the IP address or FQDN of your Nagios Core server:
http://10.25.5.143/nagios
http://core-013.domain.local/nagios
Use nagiosadmin as the username and the password (password = 123) you provided earlier.
Installing Nagios Plugins
Nagios Core needs plugins to operate properly. Follow these steps to install Nagios Plugins.
Prerequisites
Install the required packages:
apt-get install -y autoconf gcc libc6 libmcrypt-dev make libssl-dev wget bc gawk dc build-essential snmp libnet-snmp-perl gettext
Downloading the Source
cd /tmp
wget --no-check-certificate -O nagios-plugins.tar.gz https://github.com/nagios-plugins/nagios-plugins/archive/release-2.4.6.tar.gz
tar zxf nagios-plugins.tar.gz
Compile and Install
cd /tmp/nagios-plugins-release-2.4.6/
./tools/setup
./configure
make
make install
Test Plugins
Point your browser to the Nagios Core server:
http://10.25.5.143/nagios
http://core-013.domain.local/nagios
Go to a host or service object and "Re-schedule the next check" under the Commands menu. The previous error should now disappear and the correct output will appear.
Service/Daemon Commands
Ubuntu:
systemctl start nagios.service
systemctl stop nagios.service
systemctl restart nagios.service
systemctl status nagios.service
Network Configuration for Nagios and IoT Devices
Place the Nagios server and IoT devices on the same network to enable seamless communication. Ensure that the network supports the MQTT protocol for data exchange between the IoT devices and Nagios.
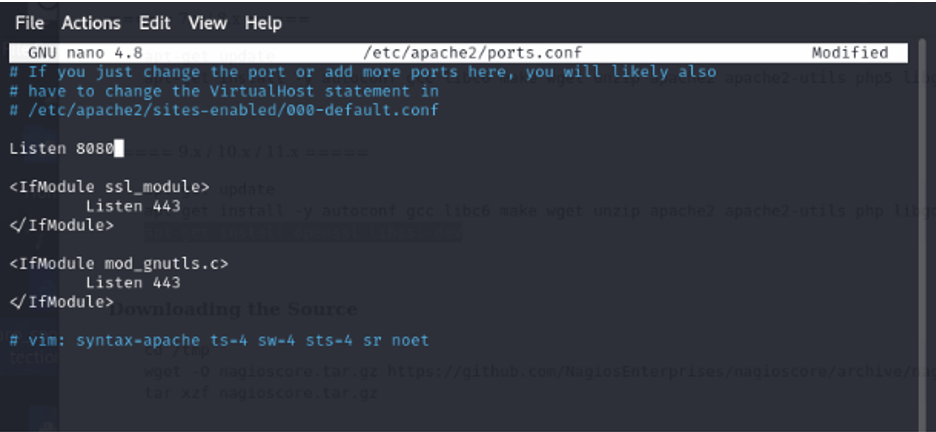
Figure 1: Port configuration for Nagios
Since there is another service running on port 80, change that to port 443 in order to run Nagios and create another Apache instance to access Nagios.
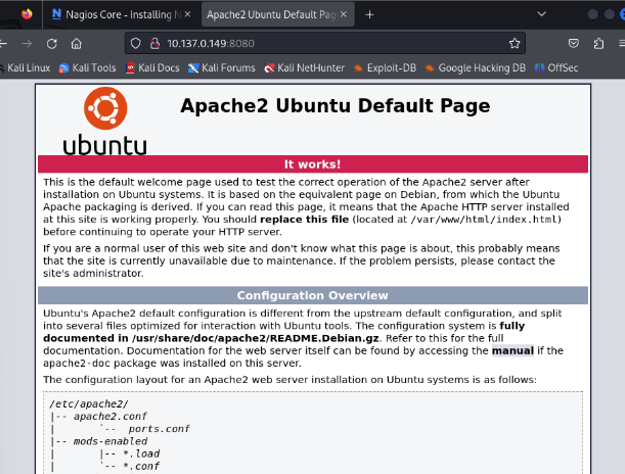
Figure 2: Apache 2 setup